Ceilings are the most difficult areas to paint, but well worth the effort. With a few simple steps ceiling painting can be much easier and produce better results. Many of the same procedures when rolling ceilings are the same as the walls.
The general plan for painting ceilings is to prepare the room, repair any damage, cut in the edges with a brush and then apply the paint to the large areas. The best plan is to finish the entire ceiling painting in one session. Allowing the paint to dry at different times will produce visible lap marks.
Preparation
Before starting the ceiling painting remove as much furniture as possible, any remaining pieces need to be moved to the center of the room.
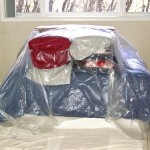 Cover the entire floor with good drop cloths and the furniture with lightweight plastic.
Plastic on the floor will not work. It won’t stay put and will stick to your feet.
Place masking paper over the tops of the window and doorframe. Also cover any windowsills. These areas can be completely covered with plastic masking film for extra protection. Use a hand held masking machine for the paper and plastic.
Any remaining items will need to be covered with light weight plastic. Hanging pictures and unmoved furniture are good examples. Completely covering the walls is not necessary if a quality roller cover and quality paint is used.
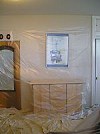
This will speed up the time to cut around the fixture with a brush. Drape plastic or masking paper over the light fixture to protect it from any splatters.
A ceiling fan can be masked with either masking paper on the blades or draped with plastic and taped secure. Most fans have a removable cover over the motor. Remove this cover if possible.
Repair drywall cracks and any damage before proceeding with the ceiling painting. Stains from water damage need to be sealed with a stain blocking primer. Apply 2 coats to be sure the stain is fully sealed. Use an appropriate interior primer for your particular situation.
Tools for Painting Ceilings
The best tools are the same as for painting walls. Use a 9-inch paint roller frame and a lambs wool roller cover.
The thickness of the cover depends on the amount or lack of texture on the ceiling, 1/2 inch for smooth and 3/4 inch for textured ceilings.
A roller pole is necessary and will save you a lot of time and effort. Choose a roller pole that is comfortable to use and extends far enough to reach over any obstacles.
To complete a professional roller set-up use a 5-gallon bucket and roller screen instead of a pan. A good paintbrush is needed to cut-in the edges and around any light fixtures. A 2-1/2—3 inch brush will work well. Use a size and style you are comfortable using.
Good tools are as important as quality paint.
Ceiling Paint
The type of paint and sheen will affect the overall appearance of the ceiling.
- For most ceiling painting jobs I recommend a high quality flat paint. Flat paint will dry evenly and is less likely to show roller lap marks. Plus flat paints can hide some imperfections.
- Areas with high humidity will need a paint with at least a little sheen. Satin sheen acrylic paint is a good choice for most bathrooms. Semi-gloss can be used if more water resistance is needed, such as ceilings in shower stalls.
Typically top quality acrylic paints are thick and will need to be conditioned before use. Add a paint conditioner, such as Flotrol, instead of water. Water will make acrylic or latex paints splatter and drip more. For oil base paints use Penitrol instead of mineral spirits. Most oil base products won’t need any conditioning for rolling.
General Ceiling Painting Methods
For most ceilings I like to use a brush and roller. Of course a ceiling can be sprayed using an airless sprayer. I recommend this method for painting acoustic ceilings. Choosing to spray a ceiling will require a lot more masking and covering.
Painting ceilings with a brush and roller is a very “user friendly” method, needing the least experience and investment in tools. The steps needed are brushing next to the walls then rolling the paint using an efficient pattern. Brushing should occur first, if one coat of paint will be applied. For two coat applications quickly roll the ceiling then cut-in twice while waiting for the ceiling to dry.
Brushing
Start by cutting in the edge of the ceiling at the walls with your brush. Bring a strip of paint out on the ceiling 3-4 inches wide. If the light fixture is accessible cut it in as well. If not, brush around it at the end of the ceiling painting.
Careful and slow brushwork is needed in order to have a straight line. Take your time.
Tape doesn’t work very well, but can act as a guide making this task a little easier. Try to apply the smallest amount of paint possibe next to the tape, dry brushing, to reduce the amount of seepage under the tape.
Flat Ceiling Painting
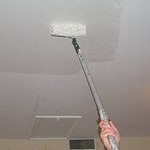
Roll in a straight-line pattern. The use of a “W” or “V” pattern will spread the paint too thin and is more work than necessary. A straight pattern applied opposite of your main viewing angle will help hide any roller marks. By applying the paint in sections and working back and forth towards the door a wet edge can be maintained.
 |
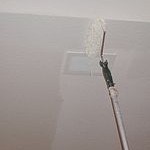 |
Begin rolling the ceiling parallel from the wall opposite of the entry door. An average stroke of the loaded roller will be 4-6 feet. This is about a third of the width of most rooms. Paint a section, 4×4 or 6×6 area, and then move over and repeat.
Blend each section while rolling by continuing each stroke into the previous section, overlapping 6 inches will be enough. Keep repeating this back and forth pattern until finished.
Rolling this way works great for smooth ceilings and paints that have a sheen, such as satin and semi-gloss. Ceilings without any texture are the most difficult to paint. Textured ceilings, orange peel and knockdown, are much easier.
Don’t press to hard on the roller. This will produce unnecessary splatters and drips. Plus, leave lines of thick paint coming off the ends of the roller cover.
Experiment on the first couple of strokes. Be careful when rolling close to the walls. To help this situation roll a band of paint next to the wall, do this as you roll a section. This will extend the brushed areas another 9 inches.
Vaulted Ceiling Painting
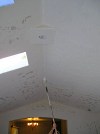
Begin applying the paint near a corner. Spread the paint in a straight-line pattern, overlapping each stroke into the previous one. Paint 1/2 of the ceiling at a time. Reduce the chance of hitting a wall by rolling slowly as you near the wall.
Source – http://www.house-painting-info.com/articles/ceiling-painting/
