Mastering the Art of Door Staining: A Step-by-Step Guide for DIY Enthusiasts
Transforming a plain wooden entryway into a stunning focal point is a rewarding project that can enhance the charm of any home. In this guide, we’ll walk you through the essential steps of how to stain a door, offering practical advice and tips tailored for both new and seasoned DIY enthusiasts. From the critical stage of wood door prep to selecting the best stain for doors, and finally achieving a flawless polyurethane finish, each step is designed to ensure your door refinishing project is a success. Whether you’re a homeowner with a passion for woodworking or simply looking to refresh your living space, our friendly guide is here to instill confidence and encouragement. So, gather your staining products, roll up your sleeves, and let’s get started on mastering the art of door staining together.## Preparing Your Door for Staining
Before you start staining, proper preparation is key to achieving a beautiful finish. This section covers the essential steps for wood door prep and the best staining products to use.
Essential Wood Door Prep Steps
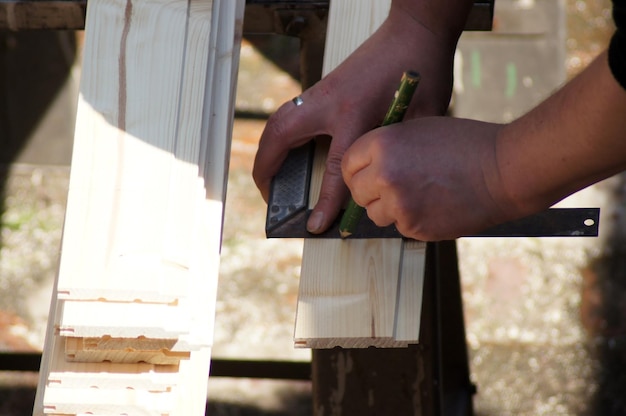
The first step in door staining is thorough preparation. This process ensures the wood is ready to accept the stain evenly and creates a smooth, professional-looking finish.
Start by removing the door from its hinges and laying it flat on sawhorses. This position allows for easier access and prevents drips. Next, remove all hardware, including doorknobs, locks, and hinges.
Clean the door thoroughly with a mild detergent solution to remove dirt and grime. Once dry, sand the entire surface with medium-grit sandpaper, followed by fine-grit for a smooth finish. Be sure to sand in the direction of the wood grain.
After sanding, wipe the door with a tack cloth to remove all dust particles. This step is crucial for achieving a clean, even stain application.
Best Staining Products for Doors
Choosing the right staining products is crucial for a successful door refinishing project. The market offers various options, each with its own benefits.
For most interior doors, oil-based stains are a popular choice. They penetrate deeply into the wood, enhancing its natural grain and providing rich color. Water-based stains are another option, offering easier cleanup and faster drying times.
Consider using a pre-stain wood conditioner, especially for softer woods like pine. This product helps the stain absorb more evenly, preventing blotchiness.
For application, high-quality brushes or lint-free rags are essential. Choose natural bristle brushes for oil-based stains and synthetic brushes for water-based products.
Lastly, don’t forget safety equipment like gloves, eye protection, and a well-ventilated workspace. These precautions ensure a safe and comfortable staining process.
Applying the Stain

Now that your door is prepped, it’s time to apply the stain. This section covers effective door staining techniques and how to choose the best stain for your project.
Door Staining Techniques Explained
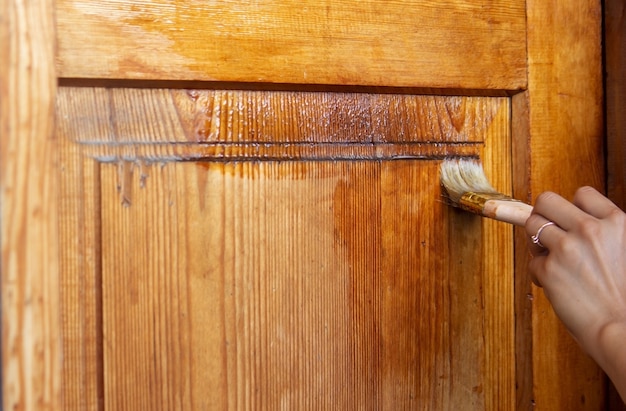
Mastering door staining techniques is essential for achieving a professional-looking finish. The key is to apply the stain evenly and allow it to penetrate the wood properly.
Begin by stirring the stain thoroughly to ensure consistent color. Apply the stain in the direction of the wood grain using a brush or cloth. Work in small sections, overlapping slightly to maintain evenness.
After applying, let the stain sit for a few minutes, then wipe off the excess with a clean cloth. The longer you leave the stain on, the darker the color will be. For a lighter finish, wipe off quickly; for a deeper tone, leave it on longer.
Remember to pay extra attention to the edges and any detailed areas of the door. These spots can easily be missed but are crucial for a uniform appearance.
Choosing the Best Stain for Doors
Selecting the best stain for your door depends on several factors, including the type of wood, desired color, and the door’s location.
For interior doors, both oil-based and water-based stains work well. Oil-based stains offer deep penetration and rich color, while water-based options provide easier cleanup and faster drying times.
Consider the wood type when choosing your stain. Some woods, like oak or mahogany, accept stain easily, while others, like pine, may require a pre-stain conditioner for even absorption.
Test the stain on a small, inconspicuous area of the door or a scrap piece of the same wood. This step allows you to see how the color will look and how the wood will react to the stain.
Sealing for Longevity
After staining, sealing your door is crucial for protecting the finish and ensuring its longevity. This section covers the importance of a polyurethane finish and provides tips for DIY success.
Importance of Polyurethane Finish
Applying a polyurethane finish is a critical step in the door staining process. This protective layer safeguards your newly stained door from wear, tear, and moisture damage.
Polyurethane comes in two main types: oil-based and water-based. Oil-based polyurethane offers durability and a warm amber glow, ideal for interior doors. Water-based polyurethane dries clear and is less odorous, making it suitable for quick projects.
Apply the polyurethane in thin, even coats using a high-quality brush. Allow each coat to dry completely before lightly sanding and applying the next. Most doors benefit from at least two coats of polyurethane for optimal protection.
Remember, proper ventilation is crucial when working with polyurethane. Ensure your workspace is well-aired to minimize fumes and promote faster drying.
Tips for DIY Door Stain Success
Success in DIY door staining comes down to patience, attention to detail, and following best practices. Here are some key tips to ensure your project turns out beautifully.
Work in a dust-free environment to prevent particles from settling on wet stain or polyurethane. If possible, choose a calm day to work outdoors or in a well-ventilated garage.
Take your time with each step, especially sanding and stain application. Rushing can lead to uneven results or missed spots. Remember, it’s easier to add more stain than to remove excess.
Keep a consistent technique throughout the process. Whether you’re applying stain or polyurethane, maintain the same pressure and direction for an even finish.
Finally, allow ample drying time between coats and before rehanging the door. Patience at this stage prevents smudges or imprints that can mar your hard work.
