[vc_row][vc_column][vc_column_text]One of the joys of home ownership is that you may paint your private residence any color that you wish to, on the inside and the outside. When you’re renting, you won’t have the same freedom to express yourself and get creative! However, you will need to follow some steps before you paint, in order to boost the odds of bringing your vision for your home exterior/interior to fruition.
The key to accessing a smooth and flawless finish while painting a home is definitely smart preparation! With this in mind, we’d like to recommend the best techniques for prepping homes for paint jobs.
It’s all about patching and priming. Once you know the right steps to take, you’ll be ready to paint like the pros do!
Patching is Really Important
![]() Before you tackle the various elements of the patching process, which prepares walls and ceilings for paint by smoothing away any roughness which might mar the painted surface, you should clear the room that will be painted.
Before you tackle the various elements of the patching process, which prepares walls and ceilings for paint by smoothing away any roughness which might mar the painted surface, you should clear the room that will be painted.
While you’re clearing, do an inspection and see where patching is needed. Keep an eye out for gaps between walls and molding, look for nail holes and hanger holes and be on the alert for wall and ceiling cracks. To patch these imperfections, utilize Spackle. Drywall mud should also work well.
If you need to fill spots between moldings and corners, we recommend a latex caulk product. When it comes to bigger cracks in walls, you should tape them and apply drywall mud.
If you notice gouges and holes in woodwork trim, patch them up with a wood filler or the type of Spackle product which is made for exterior usage. The exterior form of Spackle is a very durable material and it’s ideal for this particular interior application.
Remember that you’ll need to protect glass and floors, too! This means covering or taping anything which isn’t supposed to be painted.
Once you’ve completed all of these steps, you’ll be ready to prime!
How to Prime Like a Pro
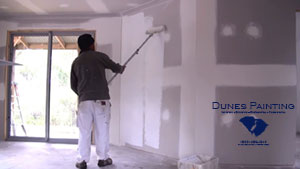
Priming is the all-important second step. You should buy an adequate amount of high-quality primer which is designed for interior usage. As well, you’ll need a paint brush and a paint roller. To begin the job, scrape away excess primer from your brush after dipping it into the primer can. This will decrease the odds of drips.

After you paint, sand the room lightly and then rub sanding dust away. A tack cloth is ideal for removing this type of dust. If you don’t see an even tone after priming, consider adding another coat. Some people need to and some people don’t.
Start Prepping Your Walls and Ceilings Today
Now that you know the best techniques for prepping homes before painting, you’ll be ready to make your home a more beautiful place![/vc_column_text][/vc_column][/vc_row]


